Wifi for the C64 (Turbo56K Modem)
Connecting a Commodore 64 to the internet might sound like science fiction, but with today’s microcontrollers, it’s surprisingly simple.
Using a NodeMCU v3 ESP8266 and the open-source pastbytes modified Zimodem firmware you can give your C64 full WiFi capability — letting you connect to BBSes, transfer files, and even chat online, all without a physical modem or phone line.
 |
| NodeMCU v3 ESP8266 |
Flash the Firmware to the ESP8266
You need the esptool to write the Firmware (Zimodem) to the Microcontroller:
- Install in Python: pip install esptool
- Command to flash the firmware:
python -m esptool -p COM_PORT write_flash 0x00000 .\zimodem\firmware.bin
Erase the ESP8266 NodeMCU Flash
- Hold the ESP8266 BOOT/FLASH button
- python -m esptool -p COM_PORT --chip esp8266 erase_flash
- When the “Erasing” process begins, you can release the “BOOT/FLASH” button
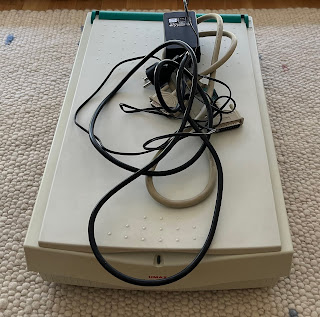
Build the Turbo56K Modem
 |
| Userport Turbo56K Wifi Modem |
We just need to connect 5 signals: TX, RX, GND, RTS and CTS. In this way it can work both in terminals that only use 3
signals, such as in terminals that also use RTS and CTS.
 |
| Front of Modem (Pin 1-12) |
 |
| Back of Modem (Pin A-N) |
This is based on the Userport of the C64:

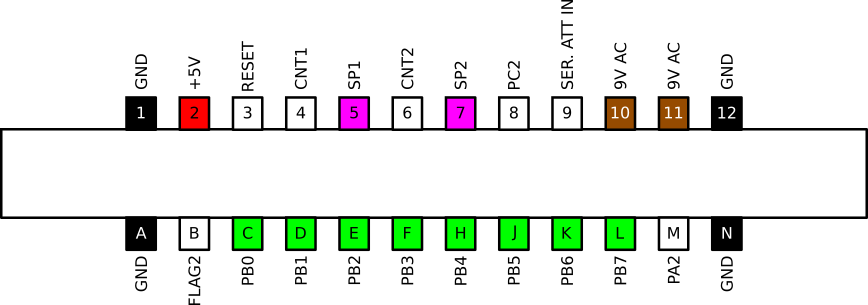
| Pin | Name | Direction | Info |
|---|---|---|---|
| 1 | GND | - | Ground (0V) |
| 2 | +5V DC | - | Max 100mA |
| 3 | RESET | in/out | Pull LOW to reset |
| 4 | CNT1 | PROG | Count 1, Connected to CNT of CIA #1 |
| 5 | SP1 | PROG | Serial Port 1 |
| 6 | CNT2 | PROG | Count 2, Connected to CNT of CIA #2 |
| 7 | SP2 | PROG | Serial Port 2 |
| 8 | PC2 | OUT | Port Control 2 |
| 9 | SER ATT IN | OUT | Serial Attention |
| 10 | 9V AC | - | 9V Supply voltage, take care! |
| 11 | 9V AC | - | 9V Supply voltage, take care! |
| 12 | GND | - | Ground (0V) |
| A | GND | - | Ground (0V) |
| B | FLAG2 | IN | A negative edge at this pin sets the FLAG bit in the interrupt control register of CIA #2 |
| C - L | PB0-PB7 | PROG | Port Register B of CIA #2 Each pin can be programmed as an input or output |
| M | PA2 | PROG | Port Register A, bit 2 of CIA #2 |
| N | GND | - | Ground (0V) |
Configure the Modem
Based on the Zimodem Firmware we can enter Hayes AT commands to configure the Modem to connect to a Wlan network.
- AT+CONFIG
connect to a wireless router, and set your flow control and other command mode settings - ATI
re-shows the startup message, including wifi connection information - ATI5
shows all the current variable settings, all 'S' registers - ATF0B57600
activate RTS/CTS flow control and set the baudrate to 57600 bps
Connect to a Turbo56K BBS
Download Retroterm to be able to use the full speed of 57600 bps what offers you webradio and other cool stuff.


Hint: With the newest version of Retroterm you can set ATF0B57600 at startup.
 |
| Setup Screen |
To connect to a Turbo56K based BBS use the atd (direct connection) command:
e.g. atd"lu4fbu.ddns.net:6400"
List of Turbo56K BBS
Thierry's Lair: thierryslair.dynet.com:64128
BBS Drean C64: bbsdreanc64c.ddns.net:10000
LU8FJH BBS: lu8fjh-c64.ddns.net:6402
LU4FBU BBS: lu4fbu.ddns.net:6400
LAB64: lab64.ddns.net:6400
64 BBS: 64bbs.ddns.net:6400


Kommentare
Kommentar veröffentlichen